Tag Archives: Fall 2019

Adobe Photoshop 2019 – Images in Text

Objective:

I can use layers and clipping masks to create an “Image in Text” picture.  

One-Sentence Objective:

Students will be able to create a picture in text effect by using clipping masks to develop an “image in text” picture so they can produce dynamic text effects using type and graphics in Photoshop.

Links:

https://www.creativepro.com/article/fill-text-images-photoshop
or
https://www.photoshopessentials.com/photoshop-text/text-effects/image-in-text/

Topics Discussed:

  • Clipping Masks
  • Layers

Assignment:

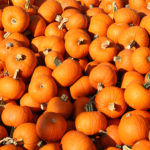
Following the instructions in the above tutorials, or the instructions in the “Images in Text” worksheet linked below, use Photoshop CC and the “Create Clipping Mask” item in the”Layers” menu to produce a total of four “Image in Text” pictures:

  1. Your name with your picture inside the text (use the iSight camera and Photo Booth to take your own picture).
  2. A fall, harvest or holiday-related word with a seasonal picture inside the text (see the “Happy Thanksgiving” image in the instructions for an example)
  3. Any other combination of a picture in the text of your choice. (Example: The word “Mustang” with a picture of a Mustang inside the word.)
  4. Place these three images, plus the “Pumpkins” image we created in class today into a folder with your name on it. You should now have four images (Pumpkins, Fall-related, Your-Face-in-Your-Name, and Your Choice).
  5. Try to turn these in by the end of the day on Monday, October 21st. Hand them in on today’s Assignment post in the Google Classroom.

Attachments:

Images In Text Instructions

pumpkins
pumpkins.jpg

Assigned: October 18th, 2019
Teacher Pacing Due Date: October 21st, 2019

Adobe Photoshop 2019 – Selecting Portions of an Image

One of the keys to mastering Photoshop is efficiently and effectively using the selection tools to select portions of an image that you wish to manipulate. Let’s get started with some basic tools and techniques to select portions of an image.

Objective: 

Based on their understanding of the capabilities of the selection tools available in Photoshop, students will choose the most appropriate tool for a specific selection purpose.

One-Sentence Objective:

Students will be able to select the right tool for any selection task by practicing with a range of different tools and selection tasks within a composite image so that they can produce more efficient and effective Photoshop edits.

Video Links:

Selecting Part of an Image:

https://helpx.adobe.com/photoshop/how-to/select-part-photo.html

Topics Discussed:

  • Arrange Windows (2UP vertical, 2UP horizontal)
  • Magic Wand Tool
  • Quick Select Tool
  • Move Tool
  • Select -> Similar
  • Select -> Inverse

Assignment:

Watch the linked video for an overview of the Selection tools we will be using today.

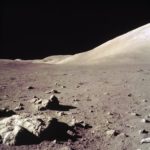
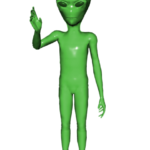
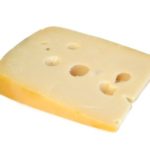
Using the tools and techniques demonstrated in the video and discussed in class, create a composite image using the Moon image (below) as a background and the Astronaut, Alien, the Moon Buggy and the Cheese in the foreground.

For an additional challenge, apply Layer Effects to change the color of the cheese to green (everyone knows the moon is made of green cheese!) and add a drop shadow to the cheese to make it a little more “realistic” (at least as realistic as a giant piece of green cheese on the moon can look!). For the maximum challenge, use the Puppet Warp technique to add a shadow to the aliens you placed on the moon’s surface!

Make sure each of the images has no traces of a white or black background. Name your layers appropriately. Save your file as “YOURNAME Moon Party.psd” and attach a copy to today’s assignment post in our Google Classroom.

Images:

Note: Click on the image thumbnail first to reveal the full-size image, then right-click the full-size image and choose “Save image as…” to save the file to your Desktop.

moon
moon.jpg
alien
alien.png
cheese
cheese.jpg
spaceman
spaceman.jpg
moonbuggy.jpg

Assigned: October 15th, 2019
Teacher Pacing Due Date: October 17th, 2019