Tag Archives: Photoshop

ADOBE PHOTOSHOP 2021 – ADJUSTMENT LAYERS

Objective:

I can effectively use Adjustment Layers to correct colors in Adobe Photoshop.

Links: 

Adjustment Layers Basics: https://helpx.adobe.com/photoshop/using/adjustment-fill-layers.html

Adjustment Layers Video:

https://helpx.adobe.com/photoshop/how-to/photoshop-layers-affected.html?set=photoshop–fundamentals–image-adjust

Topics Discussed:

  • Layers
  • Adjustment Layers
  • Non-Destructive Edit
  • Brightness & Contrast Adjustment Layer
  • Vibrance Adjustment Layer
  • Brightness
  • Contrast
  • Saturation
  • Hue

Assignment:

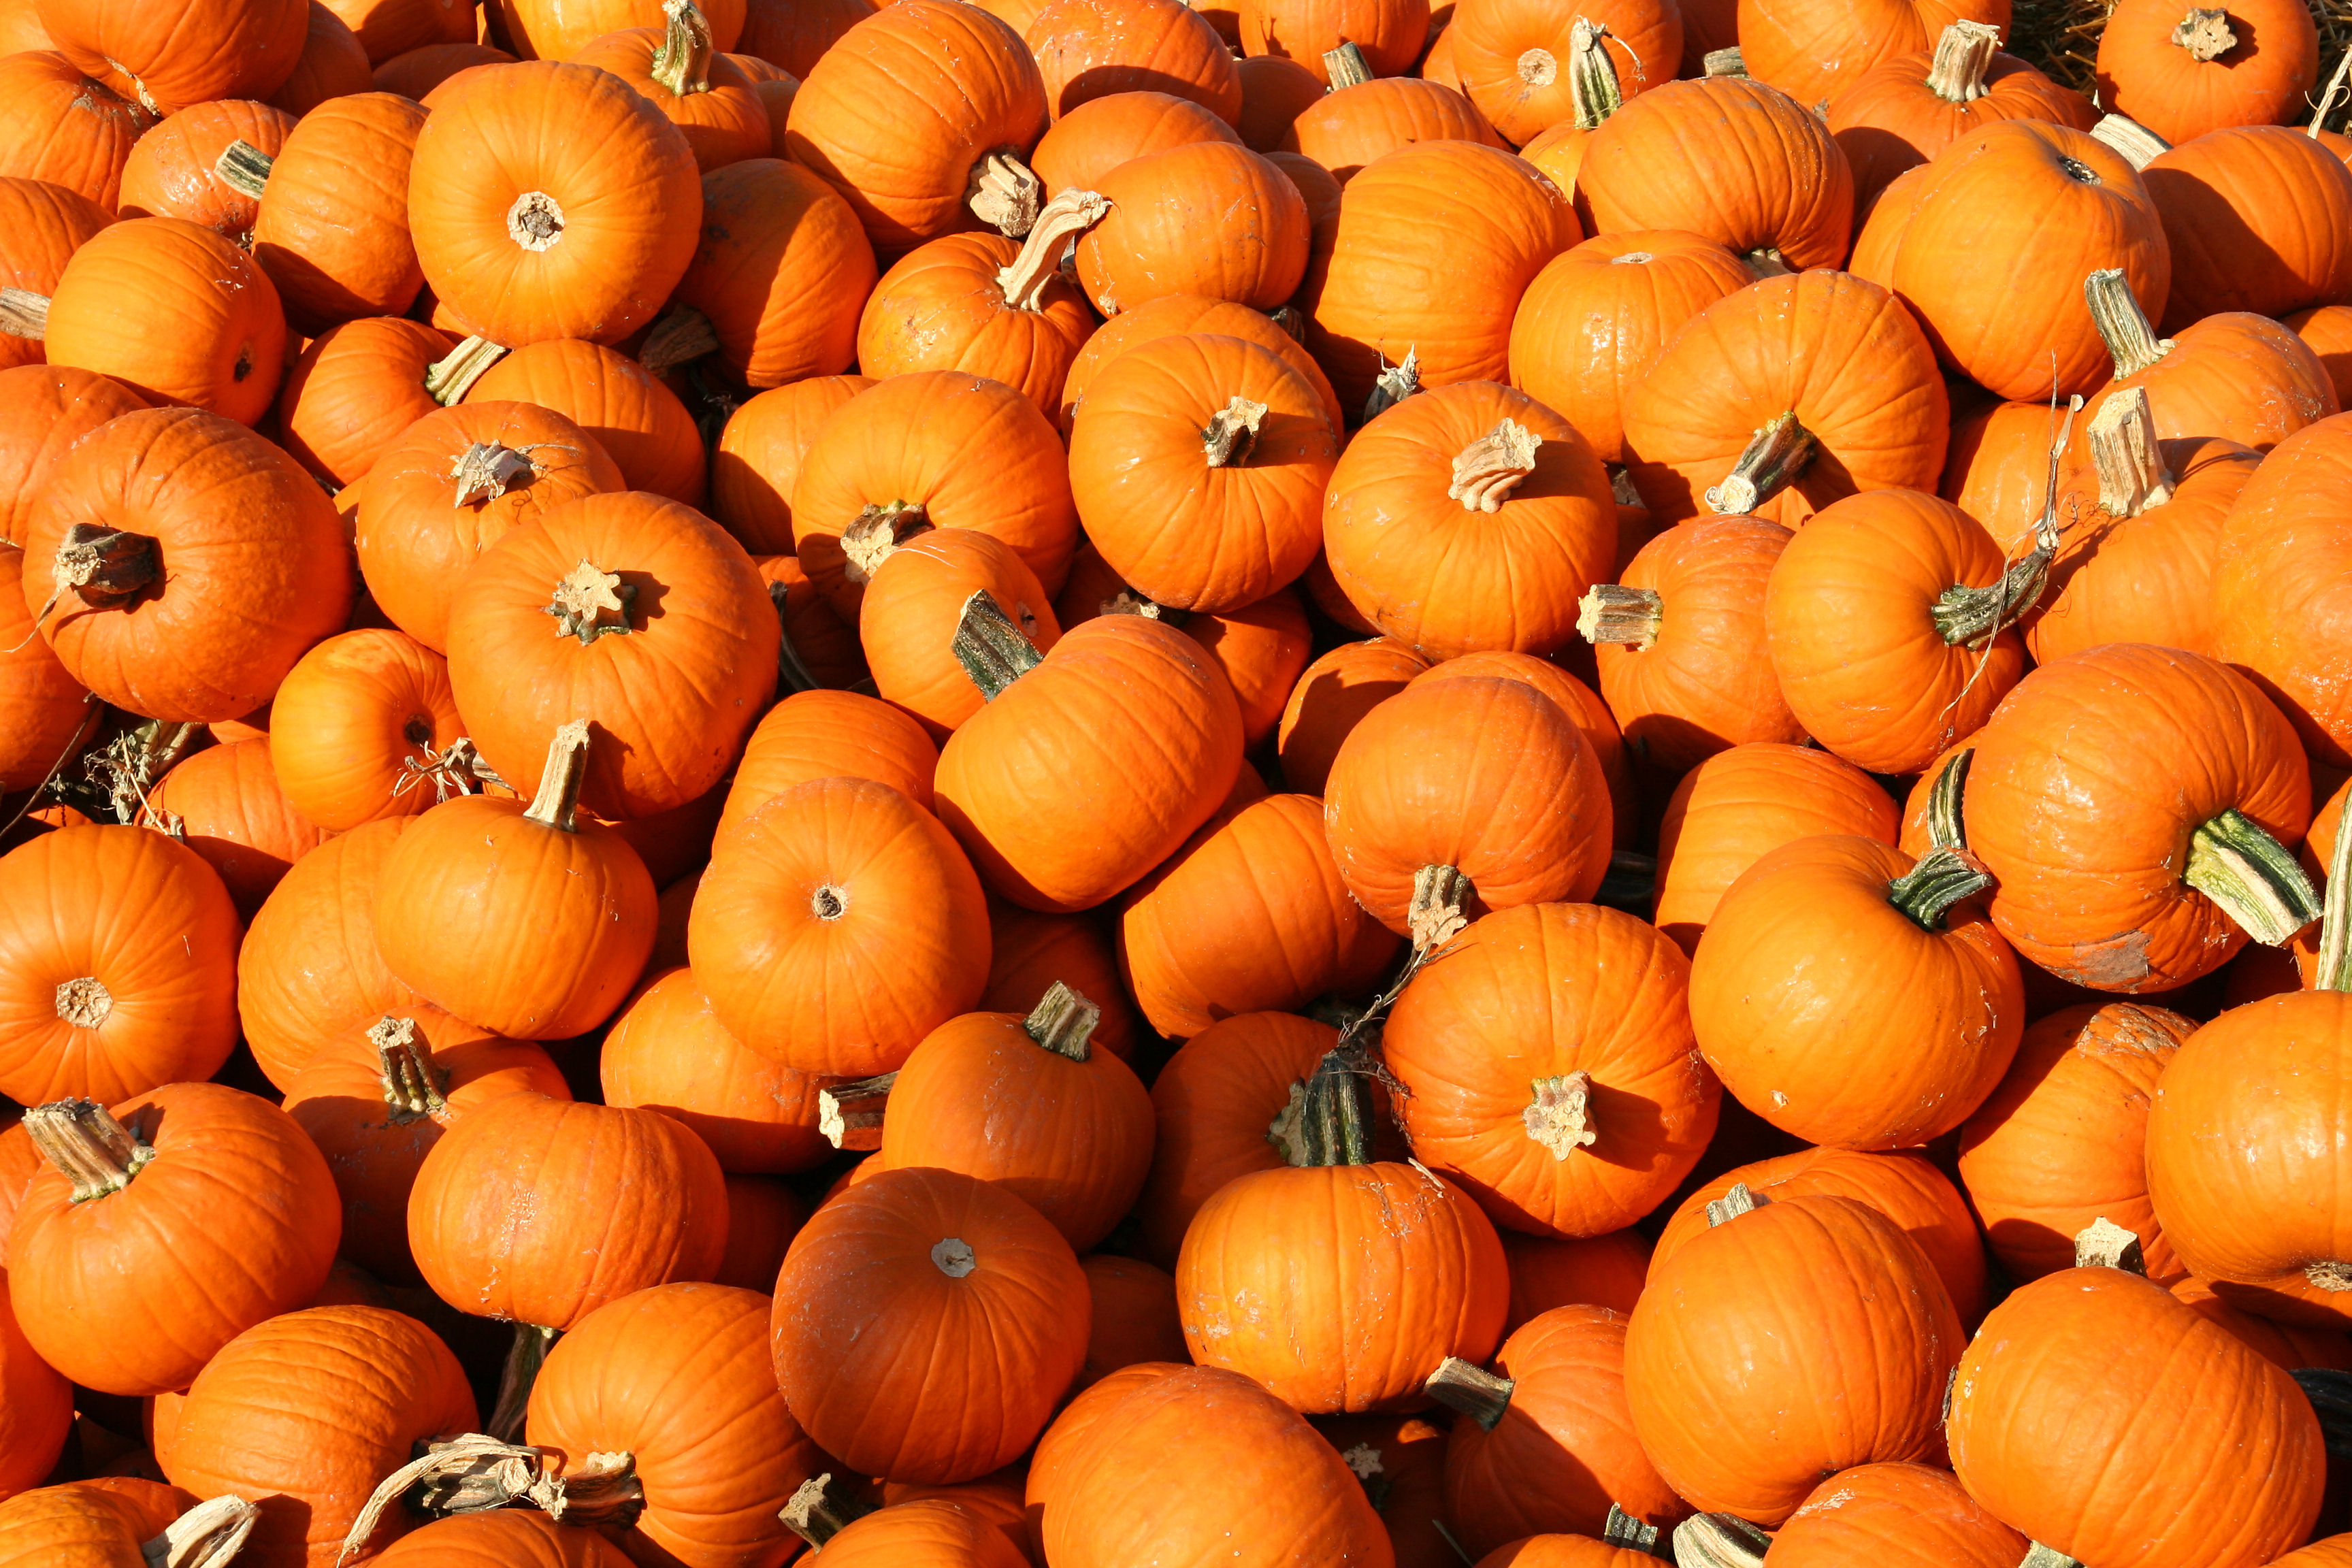
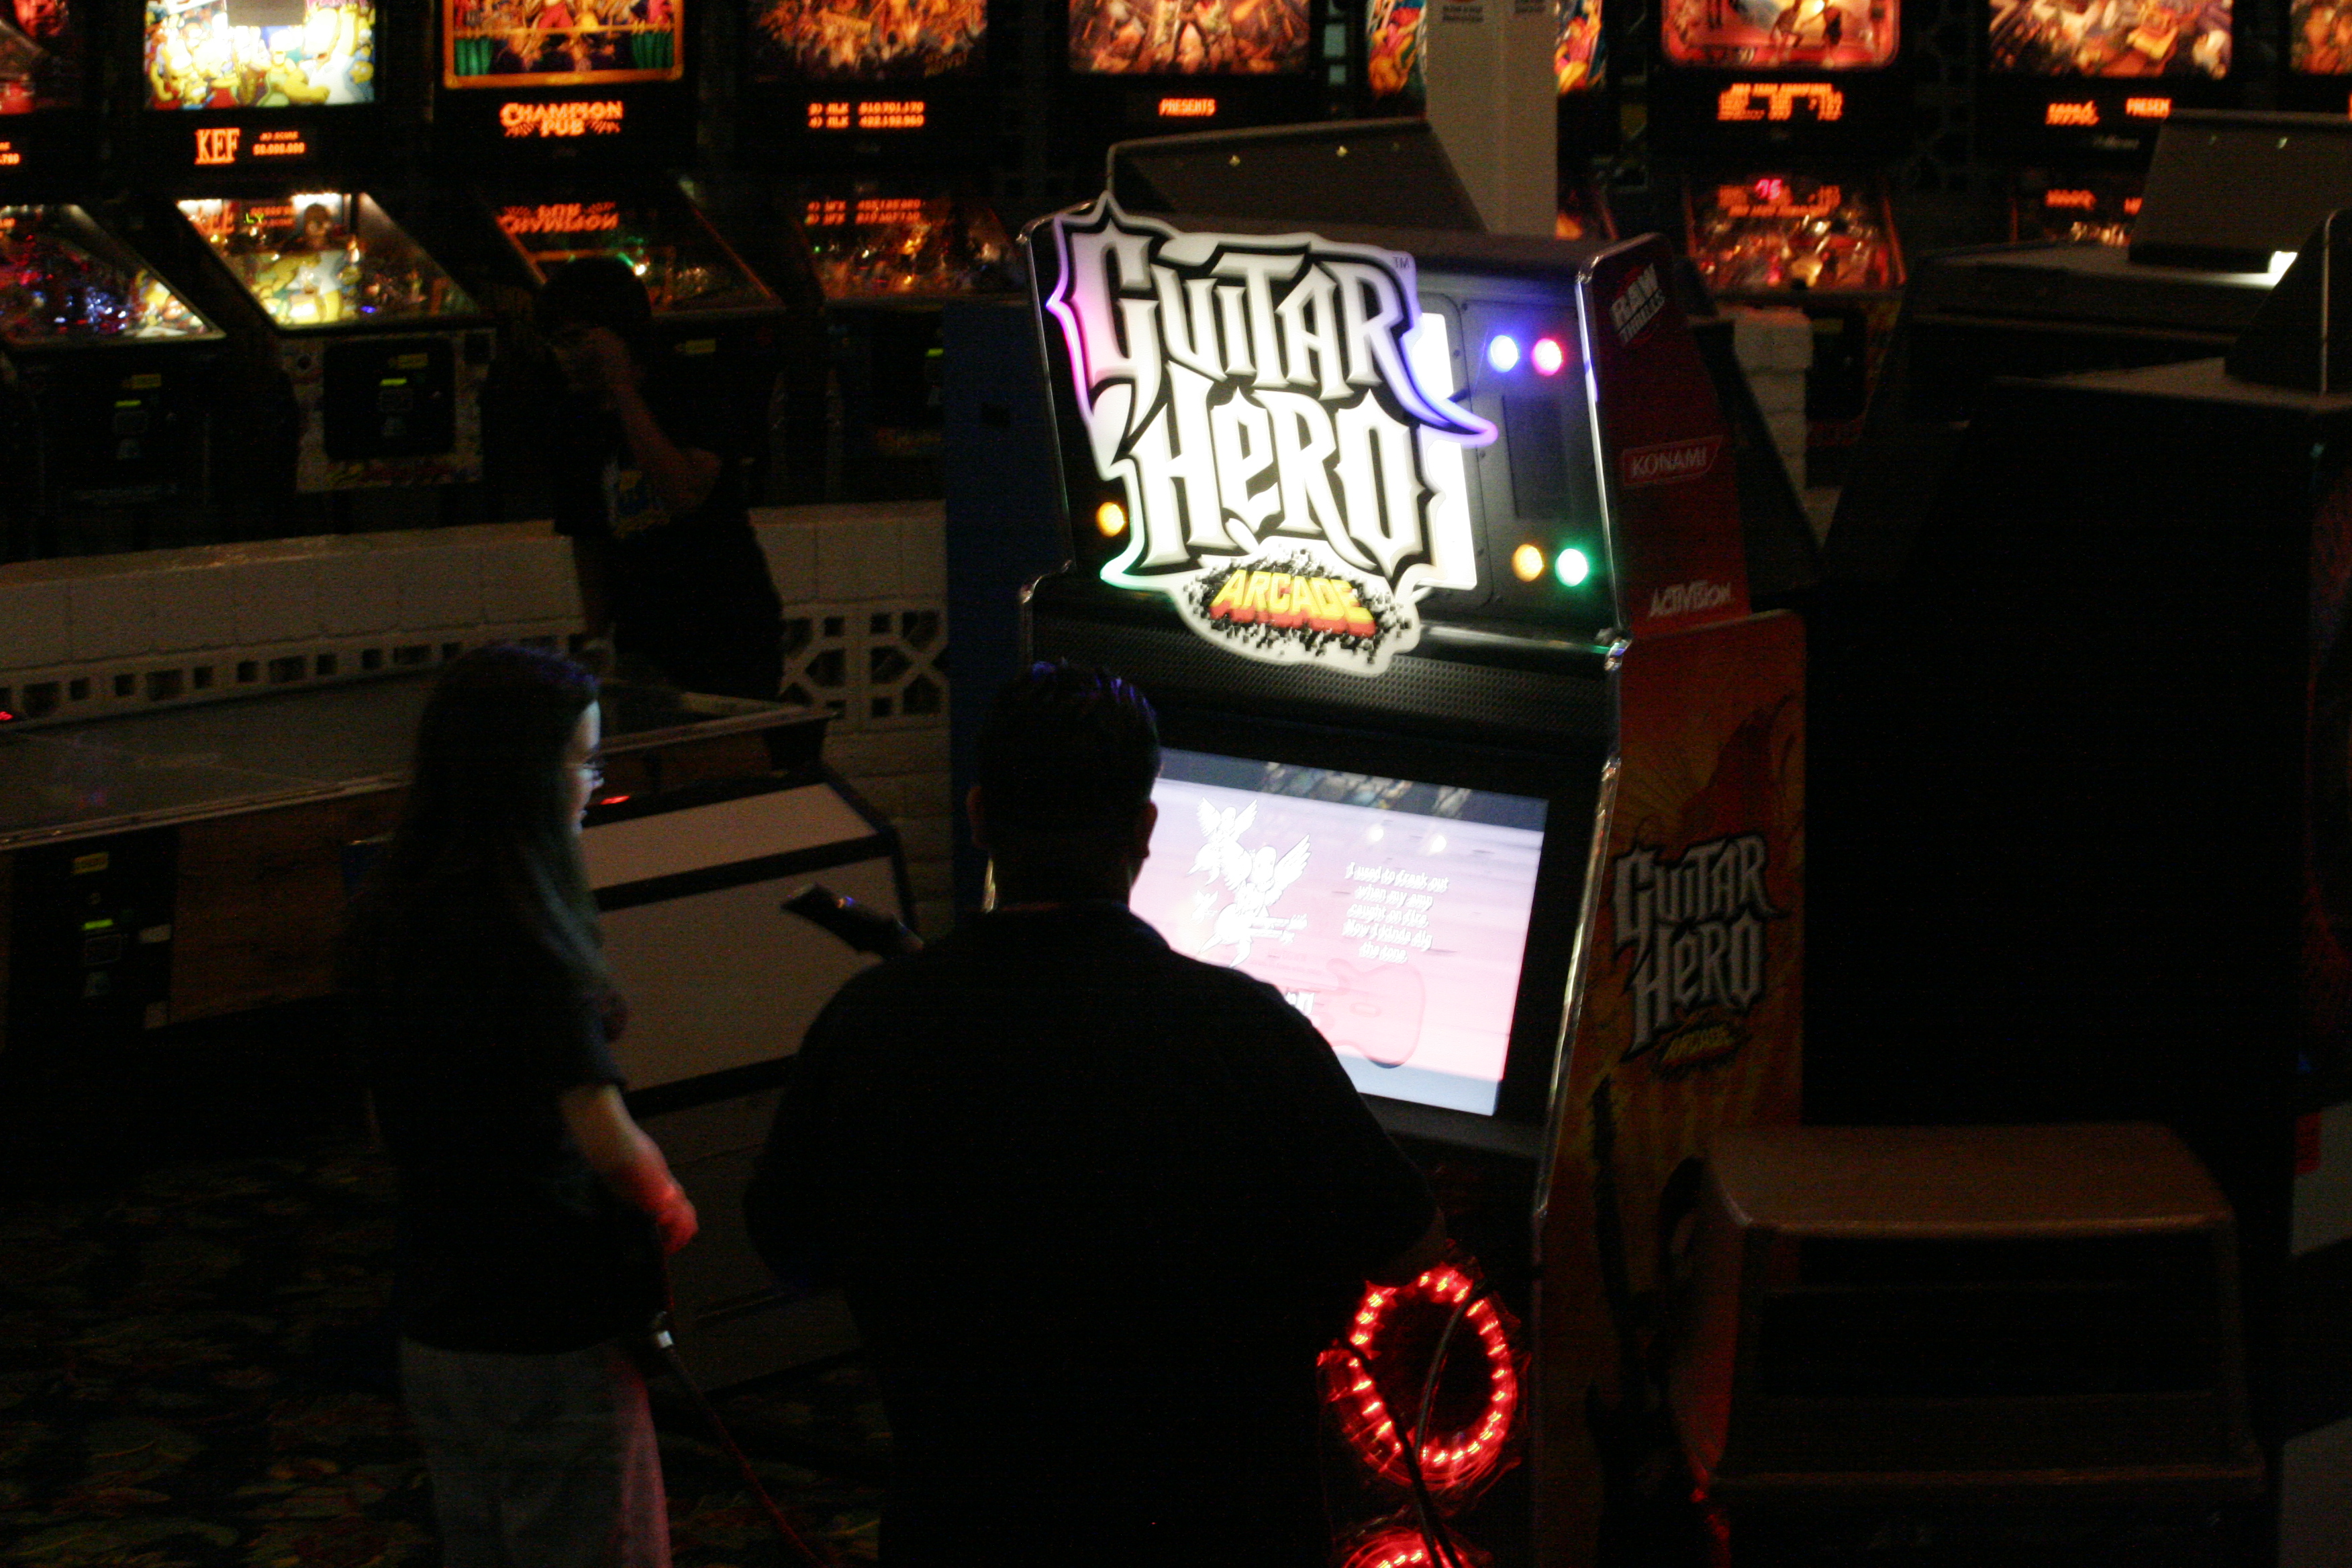
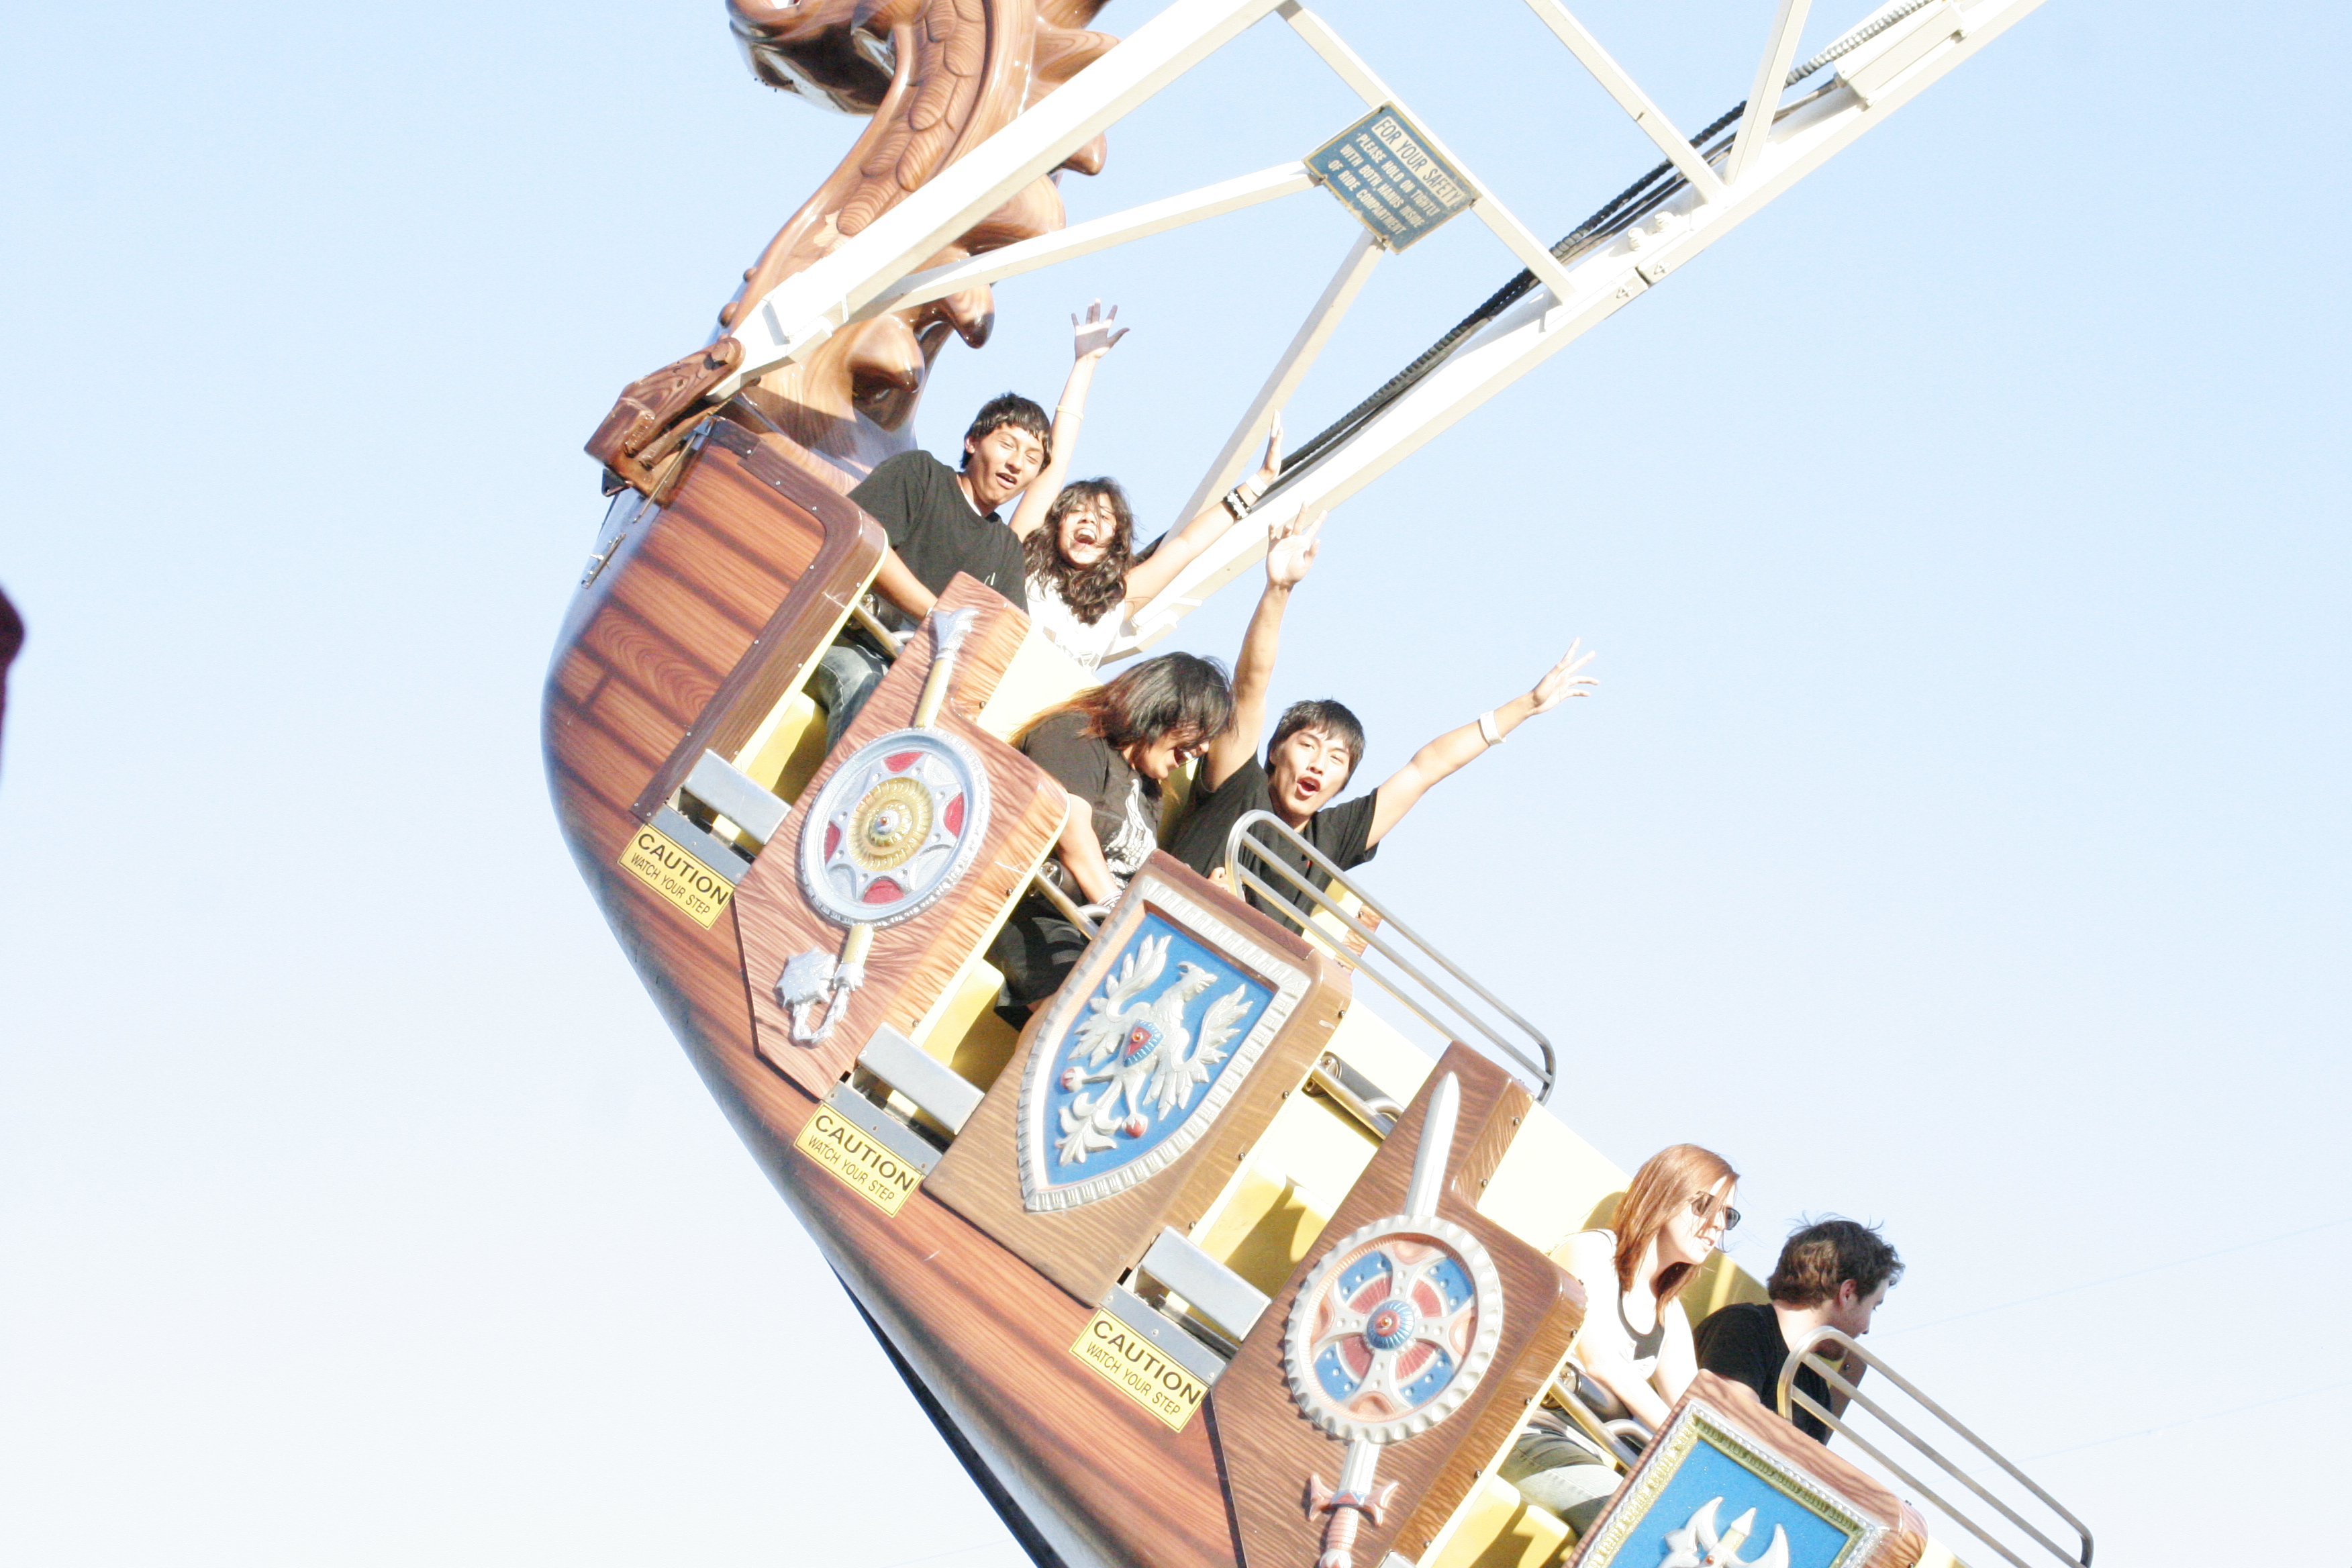
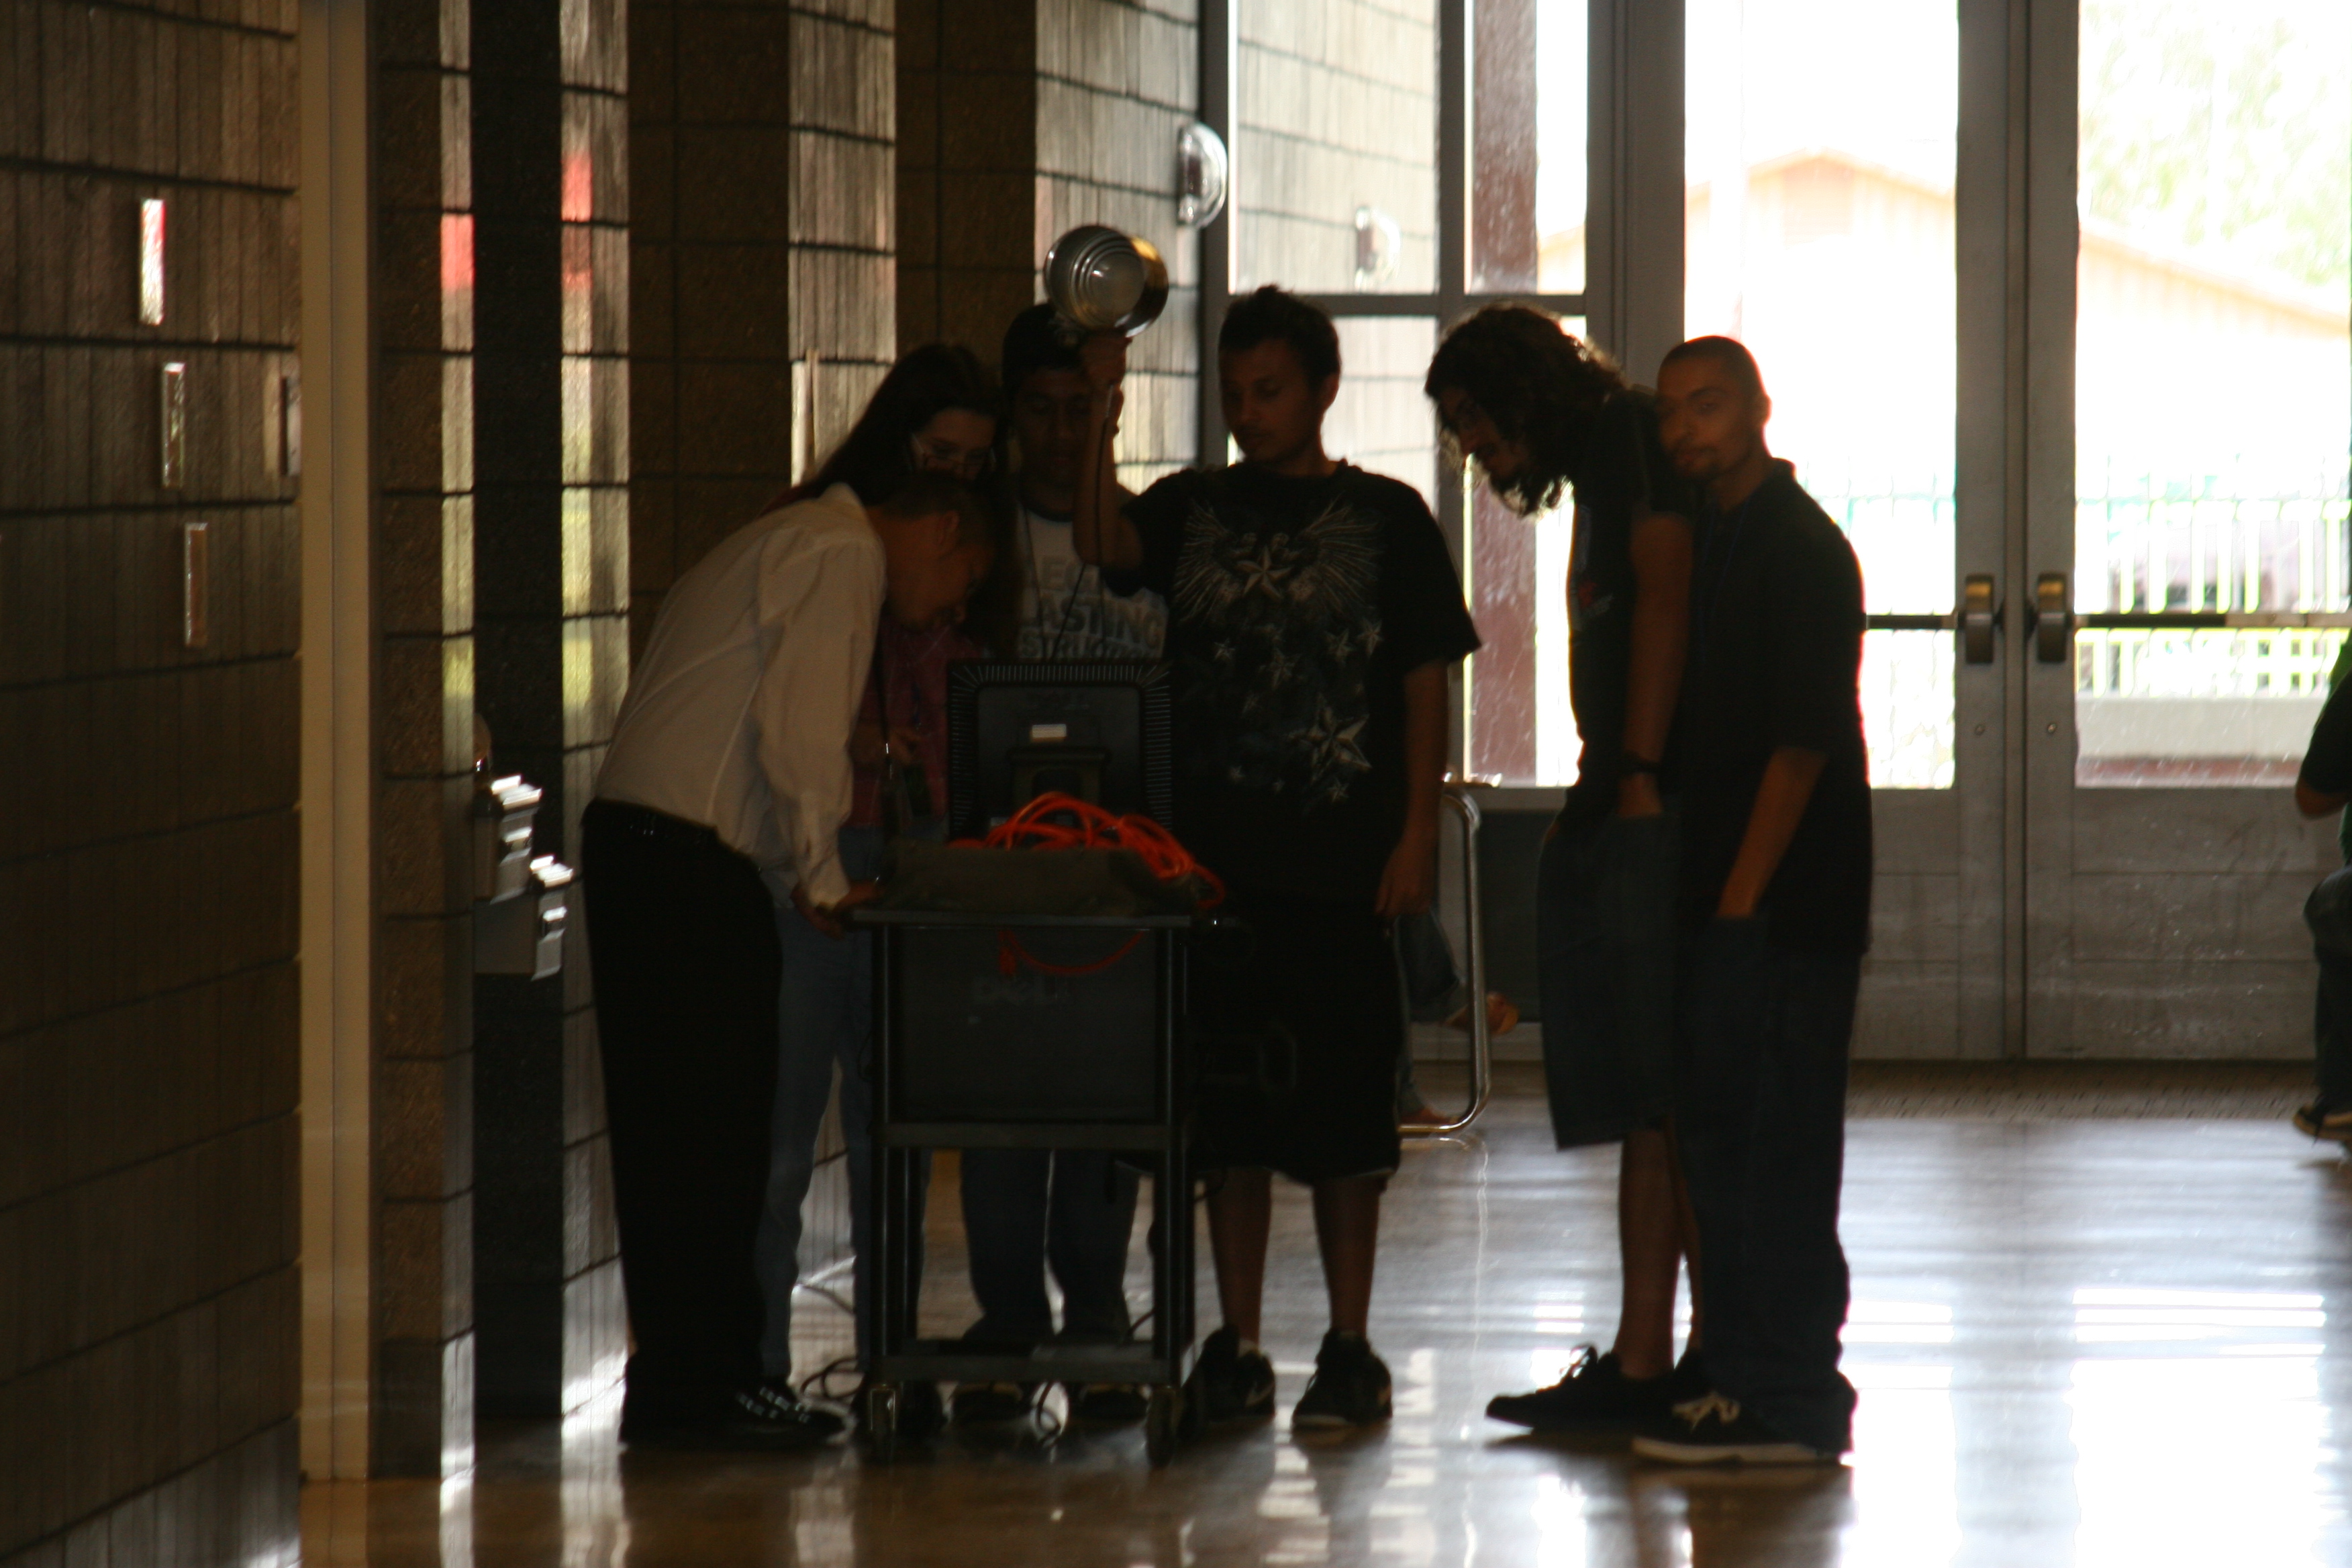
Correct the color on all four of the files posted below. Click on each file to view the full-size version, and drag a copy to your desktop.

Using the tools and techniques demonstrated in the video and discussed in class, apply a Brightness & Contrast Adjustment Layer and a Vibrance Adjustment Layer to lighten or darken the photograph as needed, and to adjust the skin tones to look natural. Make sure your screen brightness is set to at least 50% to ensure you are seeing true color. Save each file as a .PSD file with your name in the filename, put all four files into a folder. Upload each of the .PSD files to the Adjustment Layers assignment post on the Google Classroom page.

Images:

logride
guitarhero
Seadragon
Networking

Assigned: October 22nd, 2021
Teacher Pacing Due Date: October 25th, 2021

ADOBE PHOTOSHOP 2021 – IMAGES IN TEXT

Objective:

Students will be able to create a picture in text effect by using clipping masks to develop an “image in text” picture so they can produce dynamic text effects using type and graphics in Photoshop.

Links:

https://www.creativepro.com/article/fill-text-images-photoshop
or
https://www.photoshopessentials.com/photoshop-text/text-effects/image-in-text/

Topics Discussed:

  • Clipping Masks
  • Layers

Assignment:

Following the instructions in the above tutorials, or the instructions in the “Images in Text Instructions” worksheet linked below, use Photoshop CC and the “Create Clipping Mask” item in the”Layers” menu to produce a total of four “Image in Text” pictures:

  1. Your name with your picture inside the text (use the iSight camera and Photo Booth to take your own picture).
  2. A fall, harvest or holiday-related word with a seasonal picture inside the text (see the “Happy Thanksgiving” image in the instructions for an example)
  3. Any other combination of a picture in the text of your choice. (Example: The word “Mustang” with a picture of a Mustang inside the word.)

Place these three images, plus the “Pumpkins” image created in class today into a folder with your name on it. You should now have four images (Pumpkins, Fall-related, Your-Face-in-Your-Name, and Your Choice).

Try to turn these in by the end of the day on Wednesday, October 20th. Upload all four images to today’s Assignment post in our Google Classroom.

Attachments:

Images In Text Instructions

pumpkins
pumpkins.jpg

Assigned: October 18th, 2021
Teacher Pacing Due Date: October 20th, 2021